HDR Gain Map 图片
是怎么被还原与处理的How a HDR Gain-Map Photo
Gets Reconstructed and Processed
这是一篇第一人称的工程复盘:从"手机 HDR 照片为什么在很多设备上点不亮"这个矛盾出发,先讲清 HDR 到底怎么藏进 gain map,再把整条处理流程、核心合并算法、输入解析、三通道颜色恢复,以及那些靠"导出结果不对劲"才被发现的算法 bug,一步步展开。A first-person engineering retrospective: starting from the contradiction of "why a phone's HDR photo can't light up on so many devices," it first makes clear exactly how HDR is encoded into a gain map, then works step by step through the whole processing pipeline, the core merge algorithm, input parsing, three-channel color recovery, and the algorithm bugs that only surfaced because "the exported result looked wrong."
目标:提高 HDR gain map 图片的兼容性,实现多格式交付Goal: improve HDR gain-map photo compatibility and enable multi-format delivery
这个项目要解决的,是 HDR gain map 图片的兼容性问题:同一张照片,能不能被还原成真实 HDR,再按目标设备的需要交付成多种格式——电视认得的 HDR 视频、静态 HDR 图等,让原本只在手机上能发挥的 HDR 在更多设备上都用得上。动机来自一个很具体的矛盾:手机拍的 HDR 照片在手机屏上高光透亮、层次都在,可搬到客厅那台 HDR 电视上就尴尬了——电视播 HDR 视频(HDR10)毫无压力,却偏偏认不出这种带增益图的 HDR 照片,要么当成普通 SDR 图显示、HDR 效果当场全丢,要么干脆打不开。设备有 HDR 显示的本事,却因为「照片」这个格式用不上。 What this project tackles is the compatibility of HDR gain-map photos: can one photo be reconstructed into real HDR and then delivered in whatever format the target device needs — a HDR video the TV recognizes, a static HDR image, and so on — so that HDR which only worked on the phone becomes usable across more devices. The motivation came from a very concrete contradiction: an HDR photo shot on a phone looks great on the phone screen (bright highlights, full tonal range), but move it to the living-room HDR TV and it gets awkward — the TV plays HDR video (HDR10) without any trouble, yet can't recognize this gain-map HDR photo, either showing it as an ordinary SDR image with the HDR effect lost entirely, or failing to open it at all. The device has HDR display capability but can't use it, all because of the "photo" format.
电视点不亮 HDR 照片The TV can't light up HDR photos
同一台 HDR 电视,播 HDR10 视频毫无压力,可它的相册 / 图片浏览根本不认带增益图的 HDR 照片——只能当普通 SDR 图显示,或者直接打不开。屏幕有 HDR 能力,却因为「照片」这个格式用不上。 The same HDR TV plays HDR10 video without issue, but its gallery / image viewer doesn't recognize gain-map HDR photos at all — it can only show them as ordinary SDR images, or fails to open them. The screen has HDR capability but can't use it because of the "photo" format.
增益图里就存着 HDRThe HDR lives in the gain map
手机存的其实是「一张 SDR 图 + 一张增益图(Gain Map)」。HEIC 里是 Apple 的 tmap,UltraHDR JPEG 里是 hdrgm: 命名空间,本质都是「逐像素的 log2 提亮量」。两层合起来才是完整 HDR。
What the phone stores is really "one SDR image + one gain map". In HEIC it's Apple's tmap; in UltraHDR JPEG it's the hdrgm: namespace — both are essentially "per-pixel log2 boost amounts". The two layers together make the full HDR.
按设备选最兼容的格式Pick the most compatible format per device
还原出真实 HDR 后,可以落地成静态 HDR 图(JXL)或 HDR 视频等多种格式。静态格式电视基本不认,但 H.265 HDR10 的 MOV 在电视、QuickTime、剪辑软件里都能直接放——所以"做成静止 HDR 视频"是兼容性最好的一条交付路径。 Once real HDR is reconstructed, it can land as a static HDR image (JXL), a HDR video, and more. TVs mostly don't recognize static formats, but an H.265 HDR10 MOV plays directly on TVs, in QuickTime, and in editing software — so "make a still HDR video" is the most compatible delivery route.
先搞清楚:HDR 到底藏在 gain map 的哪一层First: where exactly the HDR hides in a gain map
动手写任何代码之前,我得先把编码模型弄明白:一张所谓的"HDR 照片"其实不是一张 HDR 图,而是一张 SDR base 图 + 一张增益图(gain map)。base 负责在普通屏幕上兜底显示,gain map 逐像素记录"这里还要往上提多少"。后面整条还原流程,都建立在这个双层模型上。 Before writing any code, I had to pin down the encoding model: a so-called "HDR photo" isn't one HDR image but one SDR base image + one gain map. The base provides a fallback on ordinary screens; the gain map records, per pixel, "how much further to lift here." The whole reconstruction below is built on this two-layer model.
HDR = base × 2gain。这一点决定了后面所有强度、插值、曝光补偿都得在 log 域里做。
Key intuition: the gain map stores a base-2 log boost amount (in stops), not luminance directly. So reconstruction is an exponential — HDR = base × 2gain. This is why everything later — strength, interpolation, exposure compensation — has to happen in the log domain.
base 兜底,gain map 恢复Base for fallback, gain map for recovery
SDR base 是普通屏幕直接能看的部分,高光被参考白封顶;gain map 是一张(或三张)灰度图,记录每个像素被压掉的高光要补回多少。没有 gain map,就只剩一张普通 SDR 图。The SDR base is what an ordinary screen shows directly, with highlights capped at reference white; the gain map is one (or three) grayscale images recording how much clipped highlight to restore per pixel. Without it, you're left with an ordinary SDR image.
tmap / hdrgm / ISO 21496tmap / hdrgm / ISO 21496
HEIC 里是 Apple 的 tmap 辅助图,UltraHDR JPEG 里是 Adobe/Google 的 hdrgm: 命名空间,新规范统一到 ISO 21496。封装各不相同,但本质都是"逐像素的 log2 提亮量"。In HEIC it's Apple's tmap auxiliary image; in UltraHDR JPEG it's Adobe/Google's hdrgm: namespace; newer specs converge on ISO 21496. The packaging differs, but the essence is always "a per-pixel log2 boost amount."
gamma · capacity · offsetgamma · capacity · offset
gain map 像素是 0–1 的归一化数,要靠元数据才能还原成真实 stop:gamma 校正像素值,hdrCapacityMin/Max 给出提亮量的上下界,offset 处理黑位。缺一个,提亮量就错。Gain-map pixels are normalized 0–1 values; only the metadata turns them into real stops: gamma corrects the pixel value, hdrCapacityMin/Max set the lower and upper bounds of the boost, and offset handles the black point. Miss one and the boost is wrong.
整条处理流程:从一张照片到线性 HDRThe whole pipeline: from one photo to linear HDR
明确了编码模型,处理流程就能按"一件事一个文件"拆成几个阶段:读取解码 → 增益合并 → PQ 编码 → 落地,每个阶段都能单独喂数据、单独验证,避免一条长函数从头错到尾。我把它实现成一个 C++ 内核 hdr2jxl。
With the encoding model clear, the pipeline splits into stages, "one job per file": read/decode → gain merge → PQ encode → output, each stage able to be fed data and verified on its own, avoiding one long function that goes wrong end to end. I implemented it as a C++ core, hdr2jxl.
格式检测 + 解码Format detect + decode
heic_reader / jpeg_reader:认出格式,拆出 base 层、增益图、元数据heic_reader / jpeg_reader: identify the format, extract the base layer, gain map, and metadata
增益图 → 线性 HDRGain map → linear HDR
gainmap:按 log2 公式把 SDR 提亮成线性光gainmap: boost SDR to linear light via the log2 formula
线性 → PQLinear → PQ
SMPTE ST 2084 绝对亮度编码,并写入 HDR10 色彩标签SMPTE ST 2084 absolute-luminance encoding, plus writing HDR10 color tags
JXL / HEVC
jxl_writer 出静态图;video_writer 调 ffmpeg 出视频jxl_writer produces the still image; video_writer calls ffmpeg for video
导出中间层Export intermediate layers
image_writer:base 层 + 增益图灰度,供核对image_writer: base layer + gain-map grayscale, for verification
读取层只负责「拆」The read layer only "unpacks"
判断是 HEIC 还是 JPEG,把 base 图、增益图、元数据(gamma、hdrCapacityMin/Max、offset)原样吐出来,不做任何亮度计算。读取出错就早退,不让坏数据流进算法。Decide whether it's HEIC or JPEG, and emit the base image, gain map, and metadata (gamma, hdrCapacityMin/Max, offset) as-is, doing no luminance math. On a read error it bails early, so bad data never flows into the algorithm.
合并层是唯一的「数学中心」The merge layer is the only "math center"
所有亮度相关的公式都集中在 gainmap.cpp:增益合并、sRGB↔线性、PQ↔线性、HLG↔线性。后面所有 bug 几乎都在这里改,集中放好处巨大。All luminance-related formulas live in gainmap.cpp: gain merging, sRGB↔linear, PQ↔linear, HLG↔linear. Almost every later bug was fixed here — concentrating it pays off enormously.
写出层只负责「编码 + 容器」The write layer only does "encode + container"
JXL 走 libjxl,写入 PQ / HDR 色彩信息;视频走 ffmpeg,补齐 HDR10 的编码与容器标签。写出层不重新调亮度,只把已经算好的线性 HDR 编进文件。JXL goes through libjxl, writing PQ / HDR color info; video goes through ffmpeg, filling in HDR10 encoding and container tags. The write layer doesn't re-adjust luminance — it just encodes the already-computed linear HDR into the file.
主程序只做编排The main program only orchestrates
Main.cpp 解析参数、串起读取→合并→写出,并且无论成不成功都导出 base 层和增益图。这条「总是导出旁证」的设计,是后面定位过曝 bug 的关键。Main.cpp parses arguments, chains read→merge→write, and always exports the base layer and gain map whether or not it succeeds. This "always export the evidence" design was key to later tracking down the overexposure bug.
增益图合并:一条指数公式Gain-map merge: a single exponential formula
增益图的值是 0–1 的归一化数,代表「在最小和最大提亮量之间插到哪」。真正的提亮是 2 的指数次方——这点决定了后面所有调参都得在 log2 域里做。 The gain-map value is a normalized number from 0–1, representing "where to interpolate between the minimum and maximum boost". The actual boost is 2 raised to a power — which is why all later tuning must happen in the log2 domain.
实现上逐像素跑这条公式,刻意不把结果裁剪到 1.0 以内——超过 1.0 的部分正是 HDR 高光,裁掉就退回 SDR 了。算完线性 HDR,再用 PQ(SMPTE ST 2084)曲线编码进 16-bit,交给 JXL 或 ffmpeg。 The implementation runs this formula per pixel and deliberately does not clamp the result to within 1.0 — the part above 1.0 is exactly the HDR highlights; clamping it falls back to SDR. After computing linear HDR, it encodes into 16-bit via the PQ (SMPTE ST 2084) curve, handed off to JXL or ffmpeg.
// gainmap.cpp — 合并的核心循环(节选)
float log2Gain = gain * (capMax - capMin) + capMin;   // 映射到 log2 提亮量
float factor   = std::pow(2.0f, log2Gain);             // 指数 → 线性增益因子
float hdr      = base * factor + offsetHdr;
hdrImage[idx] = std::max(0.0f, hdr);                  // 只保非负,不裁上限(保住高光)
// gainmap.cpp — core merge loop (excerpt)
float log2Gain = gain * (capMax - capMin) + capMin;   // map to the log2 boost amount
float factor   = std::pow(2.0f, log2Gain);             // exponent → linear gain factor
float hdr      = base * factor + offsetHdr;
hdrImage[idx] = std::max(0.0f, hdr);                  // keep non-negative only, no upper clamp (preserve highlights)
难的不是算,是先把增益图找出来The hard part isn't the math — it's finding the gain map first
三家厂商把增益图藏在三个不同的地方。读取层要足够健壮:标准路径走不通时要有退路,否则一张被压过的图就让整个转换失败。 Three vendors hide the gain map in three different places. The read layer must be robust enough: when the standard path fails, it needs a fallback, or one re-compressed image breaks the whole conversion.
tmap 辅助图tmap auxiliary image
遍历 HEIF 容器里的 item,按 fourcc 't','m','a','p' 找到增益图项,单独解码成单通道亮度图。位深可能是 8/10/12/16 位,按最大值归一化到 0–1。
Walk the items in the HEIF container, find the gain-map item by fourcc 't','m','a','p', and decode it separately into a single-channel luminance map. Bit depth may be 8/10/12/16-bit; normalize to 0–1 by the max value.
XMP + 内嵌 JPEGXMP + embedded JPEG
从 hdrgm: 命名空间正则提取 gamma、capacity、offset;增益图本身是文件尾部第二张内嵌 JPEG,靠 Container:Item 长度定位。
Regex-extract gamma, capacity, and offset from the hdrgm: namespace; the gain map itself is a second JPEG embedded at the end of the file, located via the Container:Item length.
双阶段定位Two-stage location
优先用 MPF 段里的绝对偏移直接跳到增益图;MPF 缺失或被改写时,退回全文件扫描 JPEG 起始标记(0xFFD8)找第二张图。两条路都留着。
Prefer the absolute offset in the MPF segment to jump straight to the gain map; when MPF is missing or rewritten, fall back to scanning the whole file for the JPEG start marker (0xFFD8) to find the second image. Both paths are kept.
- 症状Symptom
- 增益图像素数和主图对不上,直接套用就错位甚至崩溃。The gain map's pixel count doesn't match the main image; applying it directly causes misalignment or even a crash.
- 原因Cause
- 为省空间,厂商常把增益图存成主图的 1/2 或 1/4 分辨率。To save space, vendors often store the gain map at 1/2 or 1/4 the resolution of the main image.
- 修复Fix
- 读取层先把增益图双线性放大到主图尺寸再交给合并层,让后续逐像素公式能直接一一对齐。The read layer bilinearly upscales the gain map to the main image's size before handing it to the merge layer, so the per-pixel formula aligns one-to-one.
彩色高光不只是更亮,还要把颜色救回来Colored highlights aren't just brighter — the color has to be brought back
普通单通道 Gain Map 只回答一个问题:这个像素该提亮多少。RGB 三通道 Gain Map 多回答了两个问题:红、绿、蓝分别该提多少,以及哪个通道曾经在 SDR base 里被截断得更严重。对霓虹、屏幕、夕阳、车灯、强光下肤色这类彩色高光来说,这个差别非常大。 An ordinary single-channel gain map answers one question: how much should this pixel be brightened. An RGB three-channel gain map answers two more: how much should red, green, and blue each be boosted, and which channel was clipped more severely in the SDR base. For colored highlights like neon, screens, sunsets, car lights, and skin under strong light, this difference is large.
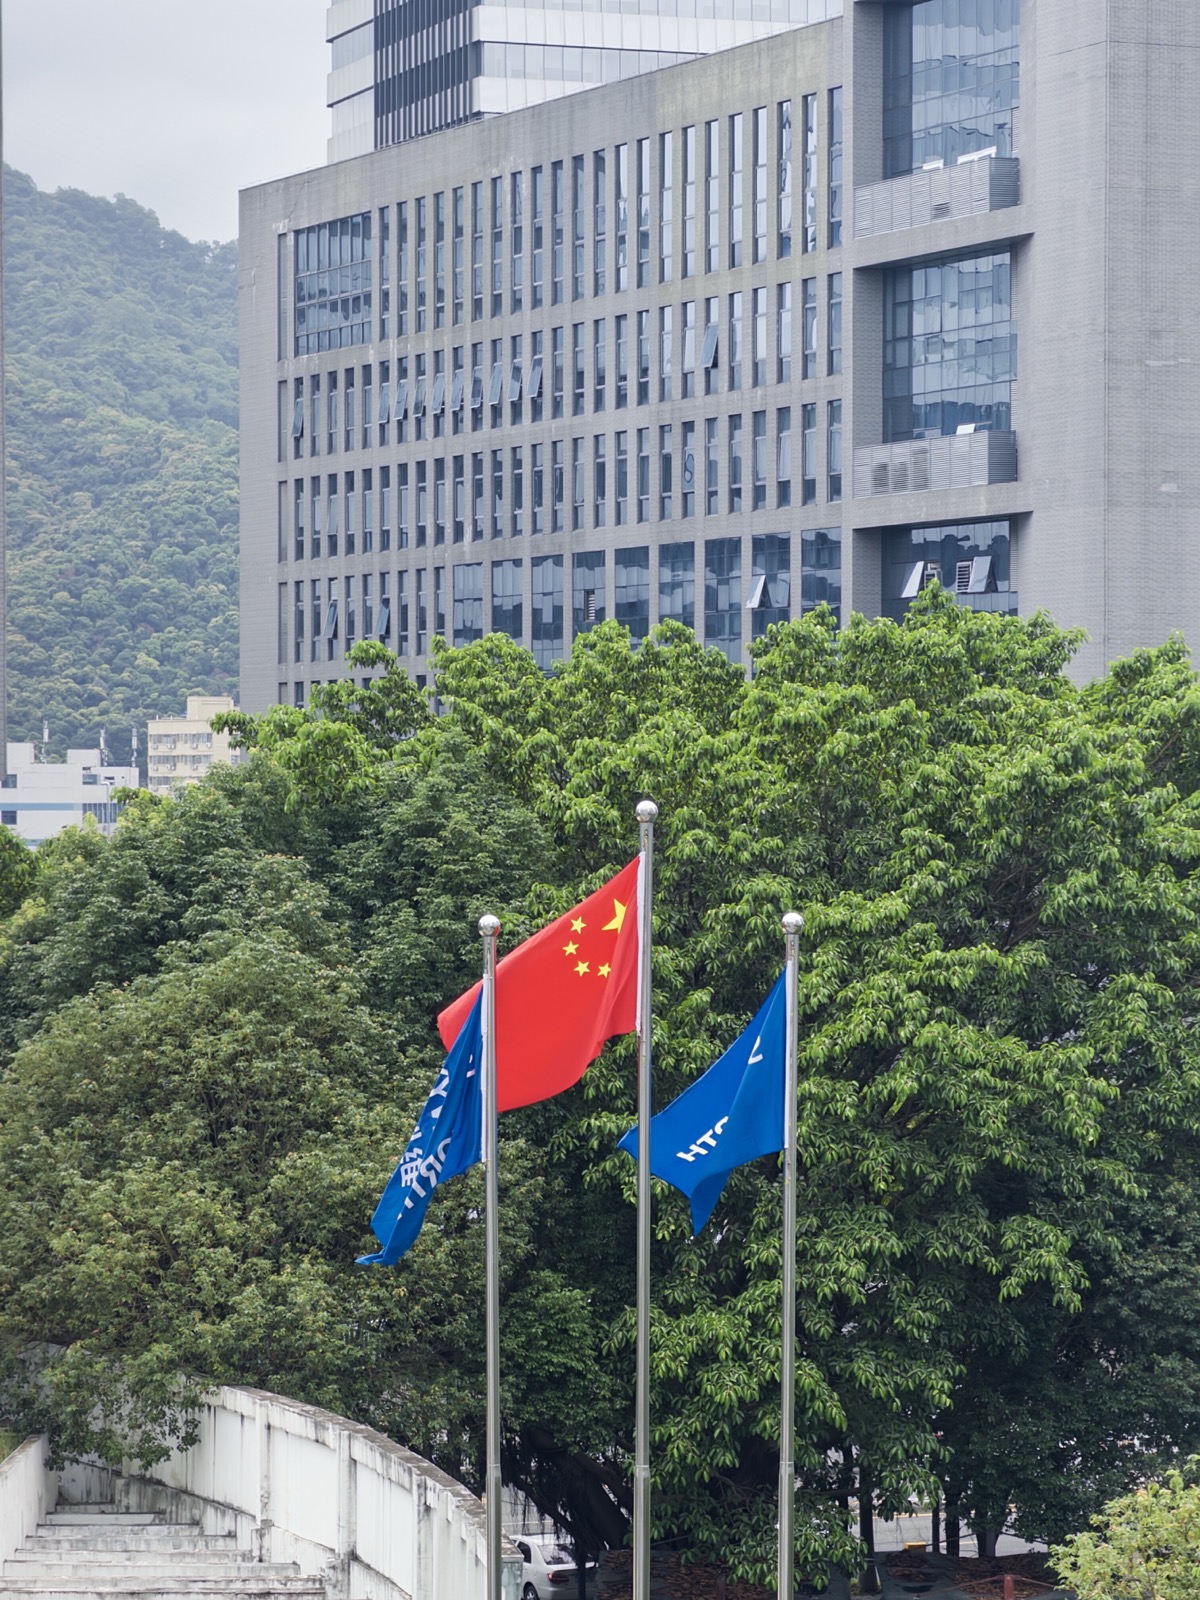
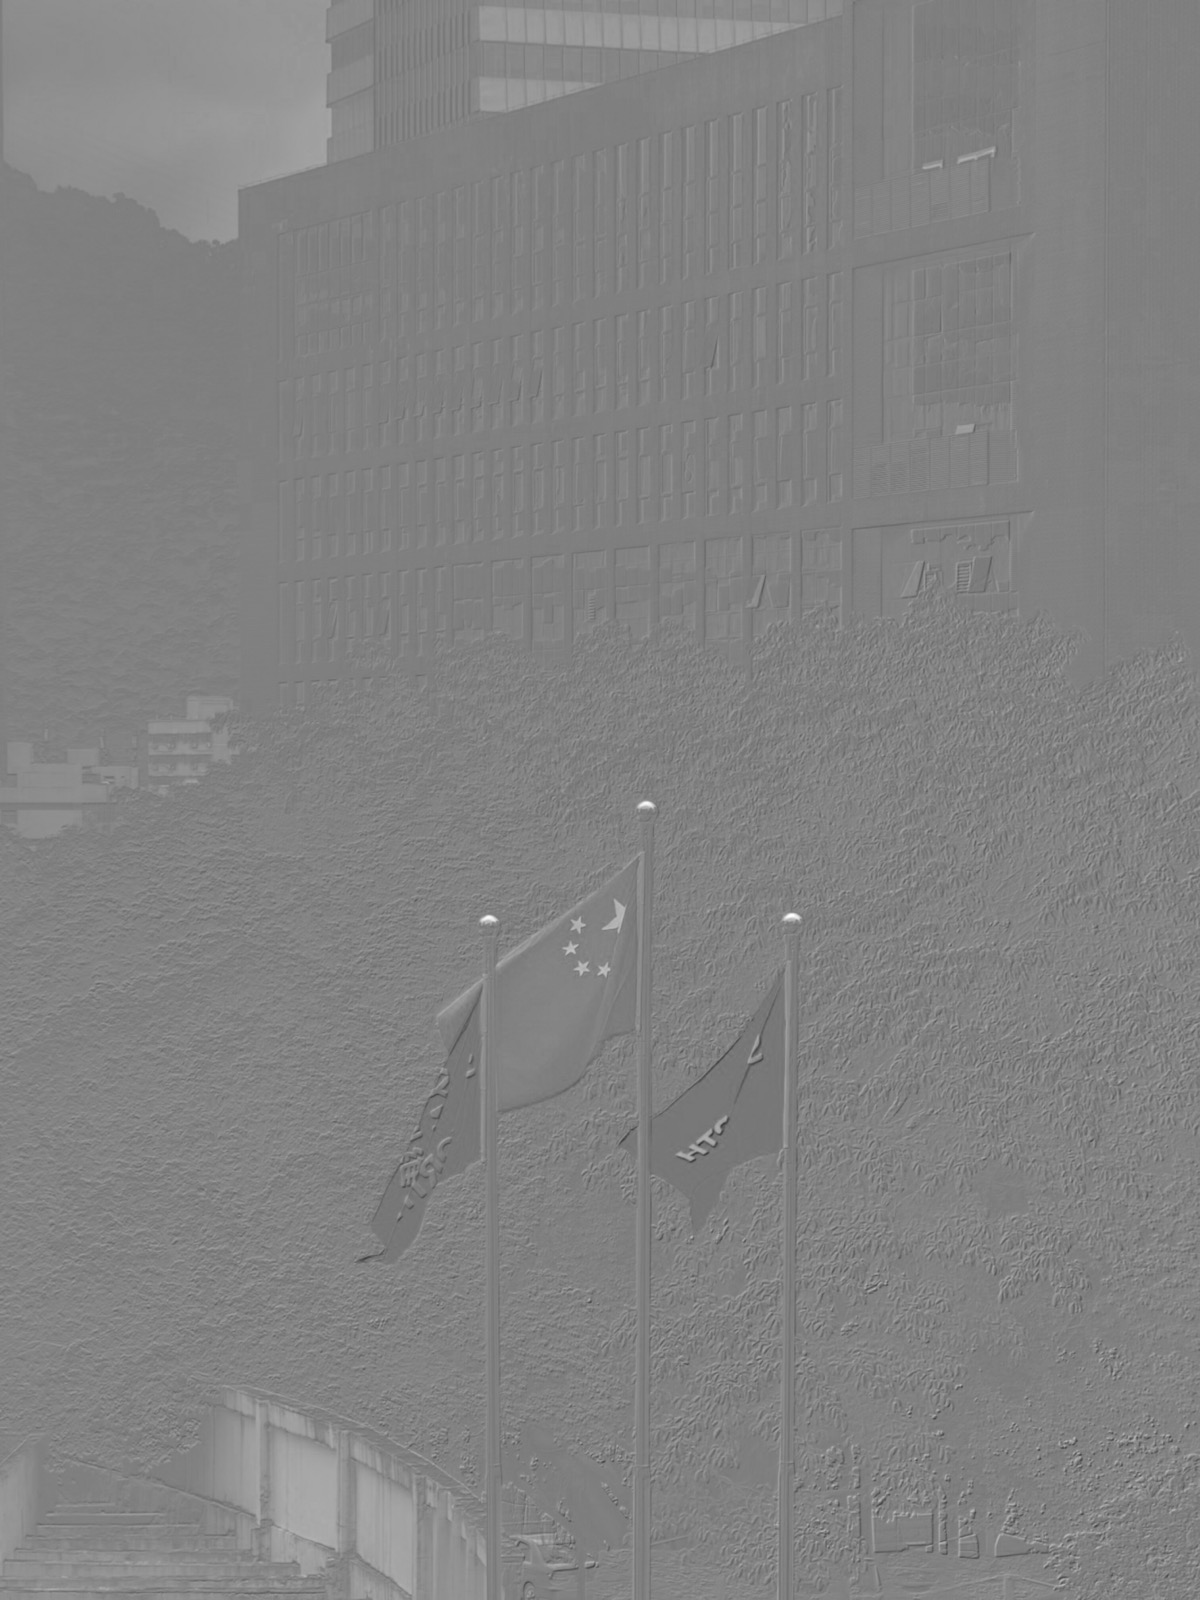
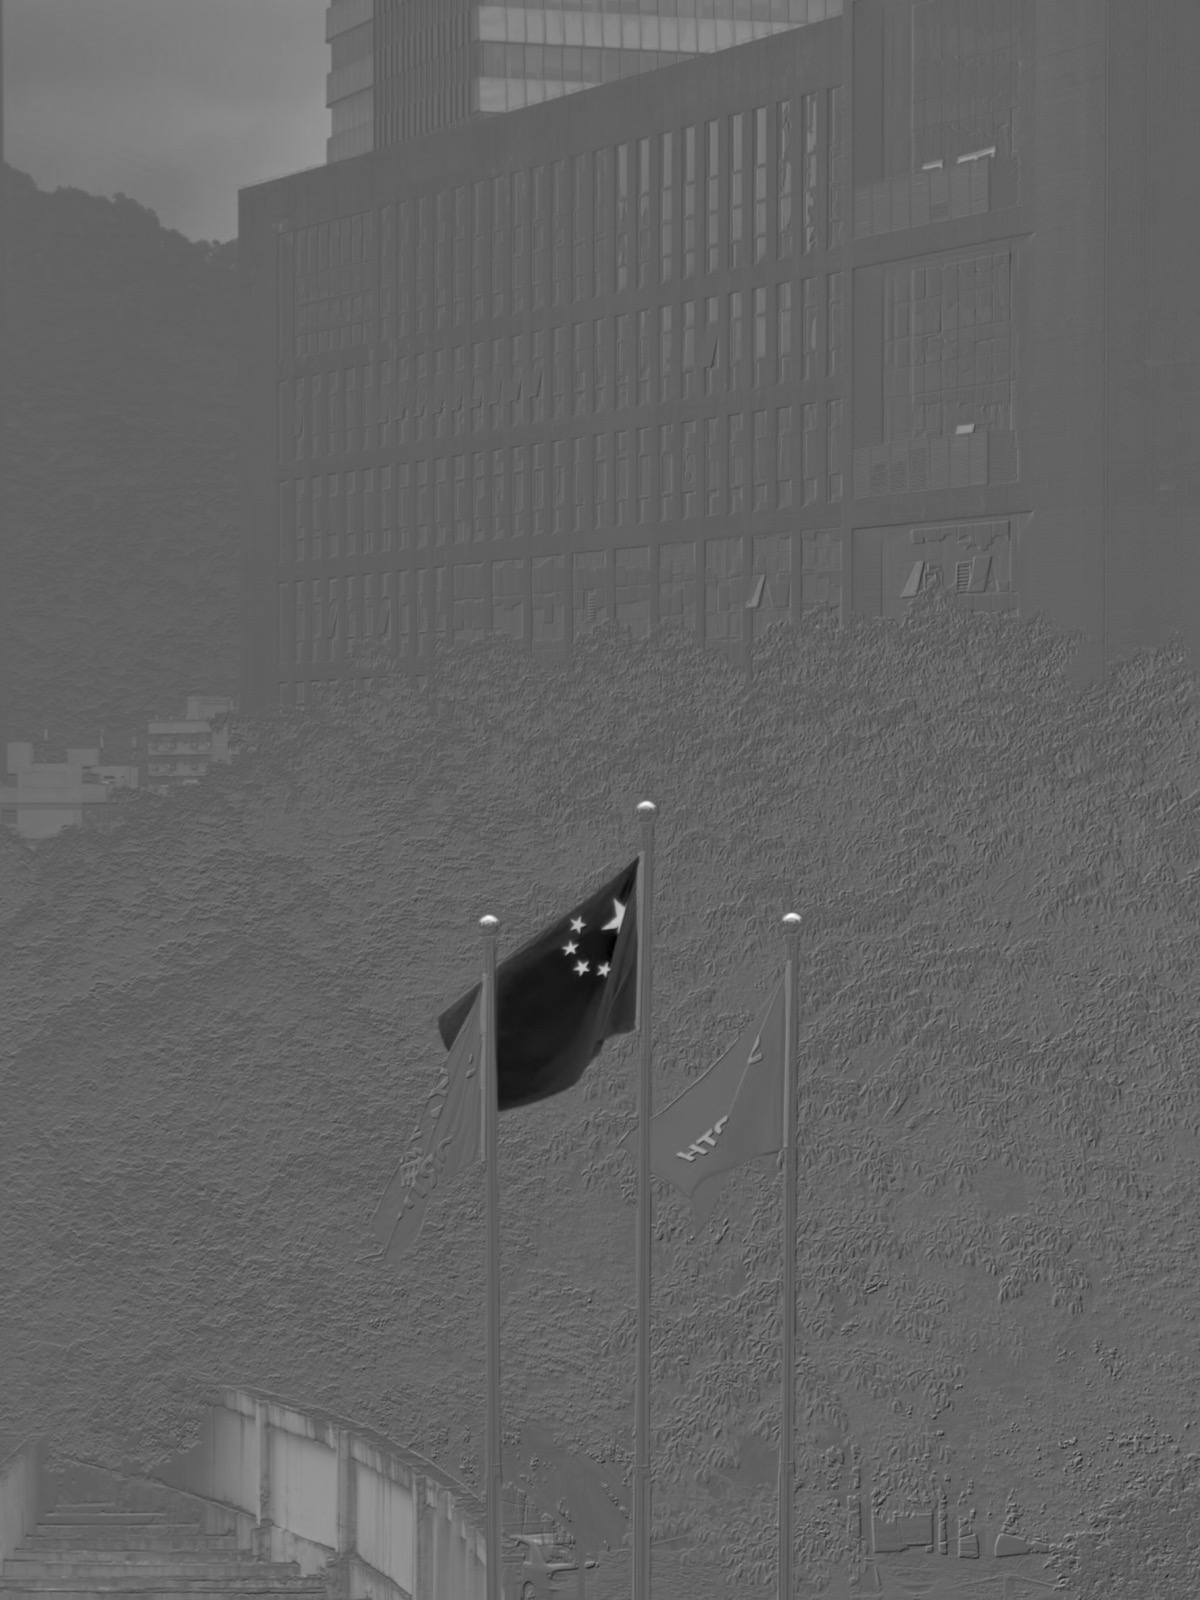
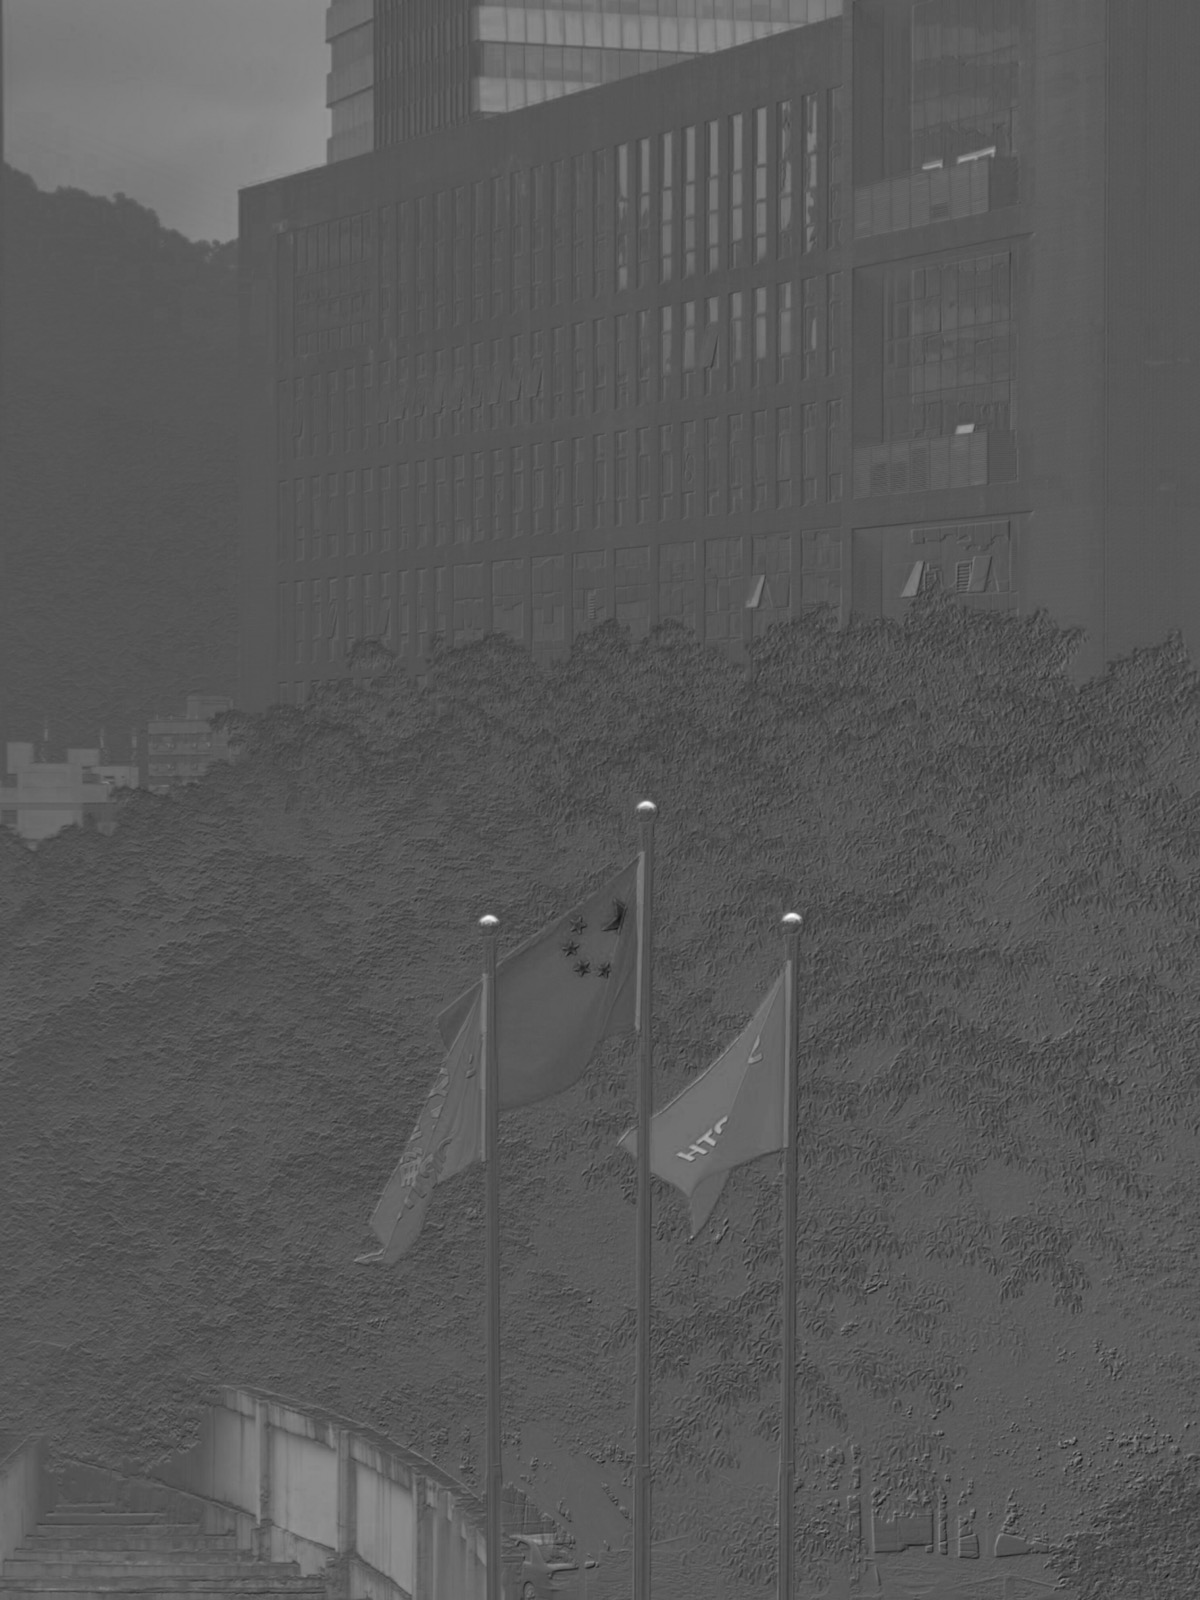
这张 IDG_2026061_RGBGainmap.jpg 的元数据显示,拍摄设备为 Apple iPhone 17 Pro;文件封装是 JPEG + MPF 内嵌第二张 JPEG 的 Gain Map 结构,并同时带有 Adobe hdrgm: XMP 与 ISO 21496 标记。它的增益图不是一张灰度图复制三遍,而是 RGB 三通道 Gain Map:R、G、B 各自有不同的增益范围,在每个颜色通道上分别记录「还应该往 HDR 里抬多少」。这对彩色高光很关键,因为 SDR 截断通常不是三个通道一起、均匀地撞顶。
This IDG_2026061_RGBGainmap.jpg's metadata shows the capture device as Apple iPhone 17 Pro; the file is wrapped as JPEG + an MPF-embedded second JPEG gain-map structure, carrying both Adobe hdrgm: XMP and ISO 21496 markers. Its gain map isn't one grayscale image copied three times, but an RGB three-channel gain map: R, G, and B each have their own gain range, separately recording "how much further to lift toward HDR" in each color channel. This matters for colored highlights, because SDR clipping usually doesn't hit all three channels together and evenly.
SDR 截断会让颜色失真SDR clipping distorts color
彩色高光进入 SDR base 时,可能是红通道先撞顶,也可能是绿、蓝被压得更多。三通道被不同程度截断后,原来的色相和饱和度就被压平了,画面看起来会发白、褪色。 When colored highlights enter the SDR base, the red channel may hit the ceiling first, or green/blue may be compressed more. Once the three channels are clipped to different degrees, the original hue and saturation are flattened and the image looks washed-out and faded.
单通道只能提亮,不能解截断A single channel can only brighten, not undo clipping
单通道 Gain Map 给 RGB 同一个倍数,只能把已经褪色的高光整体抬亮。亮度回来了,但被压坏的通道比例没有回来,所以彩色灯牌、屏幕和夕阳容易变成「亮,但没颜色」。 A single-channel gain map gives RGB the same multiplier, so it can only lift the already-faded highlights as a whole. Brightness comes back, but the ratio of the damaged channels doesn't — so colored signs, screens, and sunsets tend to become "bright but colorless".
三通道能重建颜色比例Three channels can rebuild color ratios
RGB Gain Map 可以让每个通道按自己的轨迹恢复:该补红就补红,该补蓝就补蓝。它做的不是简单调饱和度,而是在 HDR 合成阶段把被 SDR base 截断的颜色关系重新拉开。 An RGB gain map lets each channel recover along its own trajectory: add red where red is needed, add blue where blue is needed. It isn't simply adjusting saturation — it re-separates the color relationships clipped by the SDR base during HDR compositing.
还有一个感知层面的理由:Hunt 效应。人眼在更高亮度下,会期待颜色看起来更鲜艳;真实世界里的霓虹、LED 屏、夕阳和强反射也确实常常又亮又有色。如果 HDR 只把高光亮度提上去,却保留 SDR 截断后的低饱和颜色,视觉上就会显得「亮但脏」「亮但假」。三通道 Gain Map 同时补亮度和通道比例,才更接近这些彩色高光本来该有的样子。 There's also a perceptual reason: the Hunt effect. At higher luminance, the eye expects colors to look more saturated; real-world neon, LED screens, sunsets, and strong reflections are indeed often both bright and colorful. If HDR only raises highlight brightness while keeping the low-saturation color left by SDR clipping, it looks "bright but dirty", "bright but fake". A three-channel gain map restores both brightness and channel ratios, getting closer to how these colored highlights should look.
真正的算法,是被导出结果逼出来的The real algorithm was forced out by the exported results
- 症状Symptom
- 导出的 JXL / 视频整体过亮,本该是参考白的区域亮得发光。The exported JXL / video is overall too bright; areas that should be reference white glow.
- 原因Cause
- PQ 是绝对亮度曲线,线性 1.0 = 10000 nits。直接把 sRGB 满亮度 1.0 喂进 PQ,等于把「纸面白」当成了 10000 nits 的超亮高光。PQ is an absolute-luminance curve, linear 1.0 = 10000 nits. Feeding sRGB full brightness 1.0 straight into PQ treats "paper white" as a 10000-nit ultra-bright highlight.
- 修复Fix
- 合并前先把 base 层锚定到 SDR 参考白:乘以
sdrWhiteNits / 10000。203 nits 来自 ITU-R BT.2408 / libultrahdr 推荐值,让「SDR 1.0」对应到 PQ 的 203 nits 而不是满量程。Before merging, anchor the base layer to SDR reference white: multiply bysdrWhiteNits / 10000. The 203 nits comes from the ITU-R BT.2408 / libultrahdr recommended value, mapping "SDR 1.0" to PQ's 203 nits rather than full scale.
// 改前:sRGB 1.0 直接进 PQ → 被当成 10000 nits,全图过曝
float baseR = baseImage[idx];

// 改后:先把 SDR 参考白锚到 203 nits 的绝对亮度位置
const float k = sdrWhiteNits / 10000.0f;   // 203 / 10000
float baseR = baseImage[idx] * k;
// Before: sRGB 1.0 straight into PQ → treated as 10000 nits, whole image overexposed
float baseR = baseImage[idx];

// After: anchor SDR reference white to the absolute position of 203 nits first
const float k = sdrWhiteNits / 10000.0f;   // 203 / 10000
float baseR = baseImage[idx] * k;
这个数不是靠肉眼试出来的调色参数,而是把 SDR base 的相对参考白接到 PQ 绝对亮度坐标里的锚点。BT.2408 和 libultrahdr 都把 HDR 参考白放在 203 nits;没有这个锚点,SDR 的 1.0 会被 PQ 当成 10000 nits,整张图自然过曝。 This number isn't a color-grading parameter found by eye, but the anchor that ties the SDR base's relative reference white to PQ's absolute-luminance coordinates. Both BT.2408 and libultrahdr place HDR reference white at 203 nits; without this anchor, SDR's 1.0 is treated by PQ as 10000 nits and the whole image naturally overexposes.
同一张 OPPO UltraHDR 原图,分别用「漏掉锚定」的旧算法和修好的算法转成 HDR 视频,差别一眼可见——左边整屏发光、招牌和路面全糊成一片白,右边夜景层次正常、只有灯箱该亮的地方亮: The same OPPO UltraHDR original, converted to HDR video with the old algorithm that "skipped the anchor" versus the fixed one, shows an obvious difference — the left glows across the whole screen with signage and road blurred into white, the right has normal night-scene tonality with only the light boxes bright where they should be:
注:两段都是真正的 HDR10(HEVC / PQ / BT.2020)视频。在 HDR 屏上差距更夸张;这里看到的已是浏览器把 HDR 压回 SDR 后的效果,过曝那条仍然惨白。Note: both clips are genuine HDR10 (HEVC / PQ / BT.2020) video. The gap is even more dramatic on a HDR screen; what you see here is already the browser tone-mapping HDR back to SDR, yet the overexposed one is still washed white.
- 症状Symptom
- 增益强度 = 1(完整 HDR)正常,可一拖到 0(纯 SDR)画面又爆掉。At gain strength = 1 (full HDR) it's fine, but dragging to 0 (pure SDR) blows out again.
- 原因Cause
- 强度为 0 时为了省事走了一条快捷分支,忘了同样乘
sdrWhiteNits/10000,于是 sRGB 1.0 又变回 10000 nits。两条代码路径不一致。At strength 0, a shortcut branch was taken for convenience that forgot to also multiply bysdrWhiteNits/10000, so sRGB 1.0 became 10000 nits again. The two code paths were inconsistent. - 修复Fix
- 让所有强度分支共用同一个
k = sdrWhiteNits/10000系数,保证 0、1 和中间值落在同一套亮度坐标里。Make all strength branches share the samek = sdrWhiteNits/10000coefficient, so 0, 1, and intermediate values land in the same luminance coordinate system.
- 症状Symptom
- 增益强度取 0.5 这类中间值时,高光过渡浑浊,不像「一半 HDR」。At intermediate values like gain strength 0.5, the highlight transition is muddy, not like "half HDR".
- 原因Cause
- 一开始在像素值上线性插值((1−s)·SDR + s·HDR)。但提亮是 2 的指数关系,对指数结果做线性混合会破坏曝光的几何级数。At first it linearly interpolated on pixel values ((1−s)·SDR + s·HDR). But the boost is a power-of-2 relationship, and linearly blending exponential results breaks the geometric progression of exposure.
- 修复Fix
- 把插值挪到 log2 域:直接缩放指数
log2Gain × gainStrength,再做2^。强度 0 = 不提亮,强度 1 = 完整提亮,中间是平滑的曝光过渡。Move the interpolation to the log2 domain: scale the exponent directly withlog2Gain × gainStrength, then apply2^. Strength 0 = no boost, strength 1 = full boost, with a smooth exposure transition in between.
// 在指数上插值,而不是在像素上插值
float log2Gain = gain * (capMax - capMin) + capMin;
log2Gain *= gainStrength;                 // ← 关键:缩放的是指数
float factor = std::pow(2.0f, log2Gain);
// Interpolate on the exponent, not on the pixel
float log2Gain = gain * (capMax - capMin) + capMin;
log2Gain *= gainStrength;                 // ← key: it's the exponent being scaled
float factor = std::pow(2.0f, log2Gain);
- 症状Symptom
- ffmpeg 编出来的 MOV,QuickTime 要么打不开,要么当成普通 SDR 播放。The MOV encoded by ffmpeg either won't open in QuickTime or plays as ordinary SDR.
- 原因Cause
- QuickTime 只认
hvc1标签的 HEVC(不认默认的hev1),而且必须带齐 HDR10 的颜色元数据才会进 HDR 通路。QuickTime only recognizes HEVC taggedhvc1(not the defaulthev1), and it needs the full HDR10 color metadata to enter the HDR path. - 修复Fix
- 编码时显式加
-tag:v hvc1、用 10-bitp010le,并补全 BT.2020 / ST.2084 / BT.2020-ncl 三件套。Explicitly add-tag:v hvc1during encoding, use 10-bitp010le, and fill in the BT.2020 / ST.2084 / BT.2020-ncl trio.
# 让 QuickTime 认得、且走 HDR10 通路的关键参数
ffmpeg -loop 1 -i tmp.jxl \
  -c:v hevc_videotoolbox -profile:v main10 -pix_fmt p010le \
  -tag:v hvc1 \
  -color_primaries bt2020 -color_trc smpte2084 -colorspace bt2020_ncl ...
# Key parameters so QuickTime recognizes it and uses the HDR10 path
ffmpeg -loop 1 -i tmp.jxl \
  -c:v hevc_videotoolbox -profile:v main10 -pix_fmt p010le \
  -tag:v hvc1 \
  -color_primaries bt2020 -color_trc smpte2084 -colorspace bt2020_ncl ...
- 症状Symptom
- JXL 文件能写出来,但解码时颜色错乱 / 花屏。The JXL file writes out, but colors are scrambled / garbled on decode.
- 原因Cause
- basic_info 里声明的位深,必须和实际像素的数据类型严格对应;混用 16-bit 声明 + float 数据会让解码器按错误布局读取。The bit depth declared in basic_info must strictly match the actual pixel data type; mixing a 16-bit declaration with float data makes the decoder read with the wrong layout.
- 修复Fix
- 分成两条干净的路径:16-bit 走整型量化(
uint16),32-bit 走浮点(JXL_TYPE_FLOAT),声明与数据一一对应。Split into two clean paths: 16-bit uses integer quantization (uint16), 32-bit uses float (JXL_TYPE_FLOAT), declaration matching data one-to-one.
一个落地应用:把还原好的 HDR 合成视频One application: composite the reconstructed HDR into video
还原出线性 HDR 之后,能落地成很多形式。我最初的需求是"在电视上看",所以做了最实用的一种:复用算好的线性 HDR,先落一张临时 JXL,再用 ffmpeg -loop 1 循环成静止 H.265 main10(p010le)视频,打满 HDR10 颜色三件套(bt2020 + smpte2084 + bt2020_ncl),硬件编码失败就回退 libx265。视频只是众多输出之一,这里点到为止。
Once linear HDR is reconstructed, it can land in many forms. My original need was "watch it on the TV," so I built the most practical one: reuse the computed linear HDR, drop a temporary JXL, then use ffmpeg -loop 1 to loop it into a still H.265 main10 (p010le) video, stamped with the HDR10 color trio (bt2020 + smpte2084 + bt2020_ncl), falling back to libx265 if hardware encoding fails. Video is just one of many outputs, so I'll keep it brief.
拆开看:HDR 其实是两层叠出来的Taken apart: HDR is really two layers stacked
还是这张 OPPO UltraHDR 原图,导出它内部的两个中间层就能看清 HDR 是怎么合成出来的——SDR base 层是普通屏幕能显示的部分(参考白封顶、招牌已经有点发灰),增益图是一张灰度图,记录每个像素还要往上提多少 stop:灰度越亮提得越多。两层按指数公式 base × 2g 相乘,灯箱、招牌就被抬到 SDR 顶不住的亮度,得到下面那段 HDR 视频。
Same OPPO UltraHDR original — exporting its two internal intermediate layers makes clear how HDR is composited. The SDR base layer is the part an ordinary screen can show (capped at reference white, the signage already a little gray); the gain map is a grayscale image recording how many more stops each pixel should be lifted: brighter gray means more boost. The two are multiplied by the exponential formula base × 2g, lifting the light boxes and signs to a brightness SDR can't hold, giving the HDR video below.
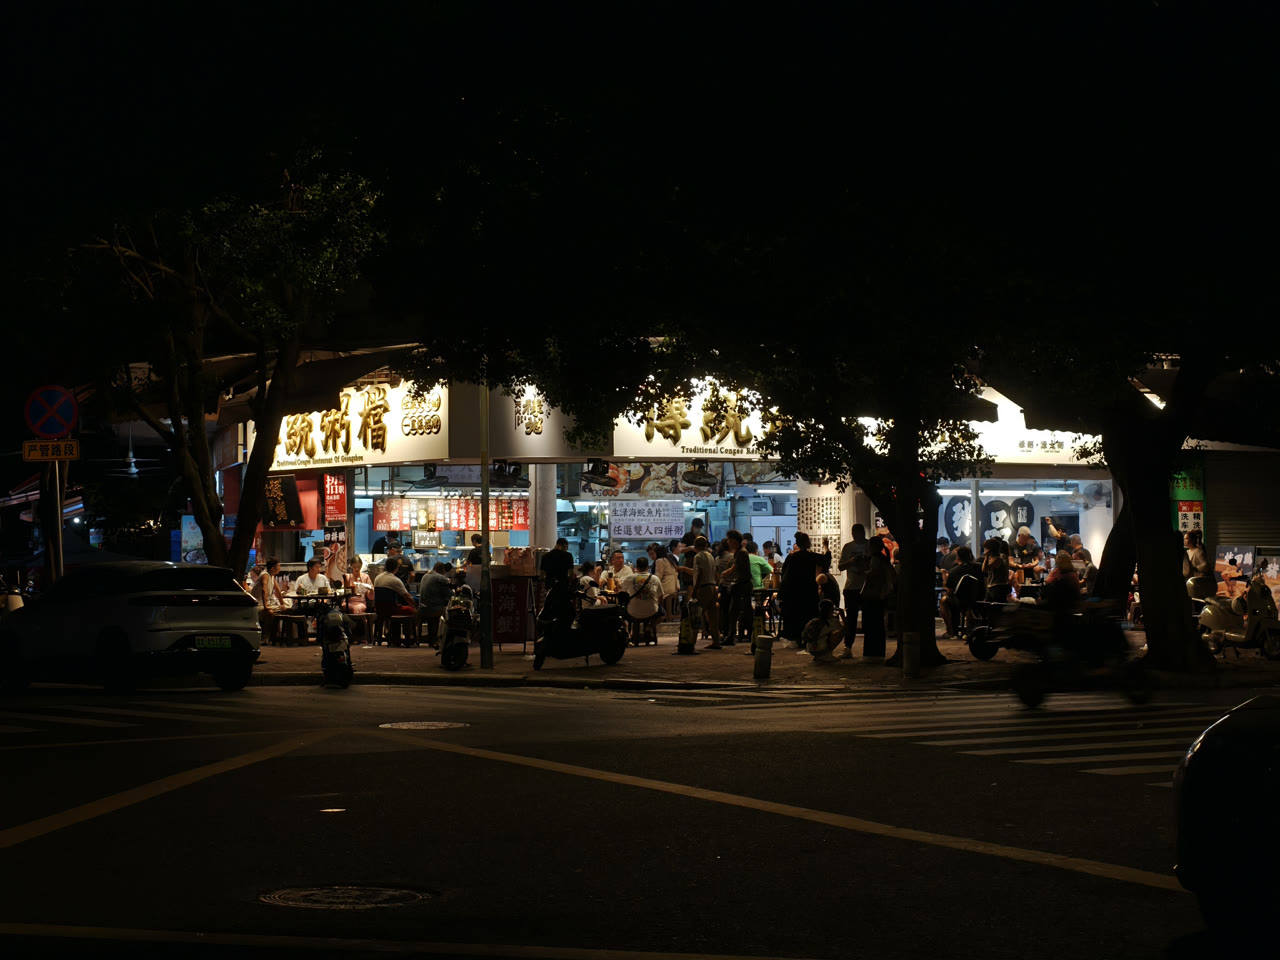
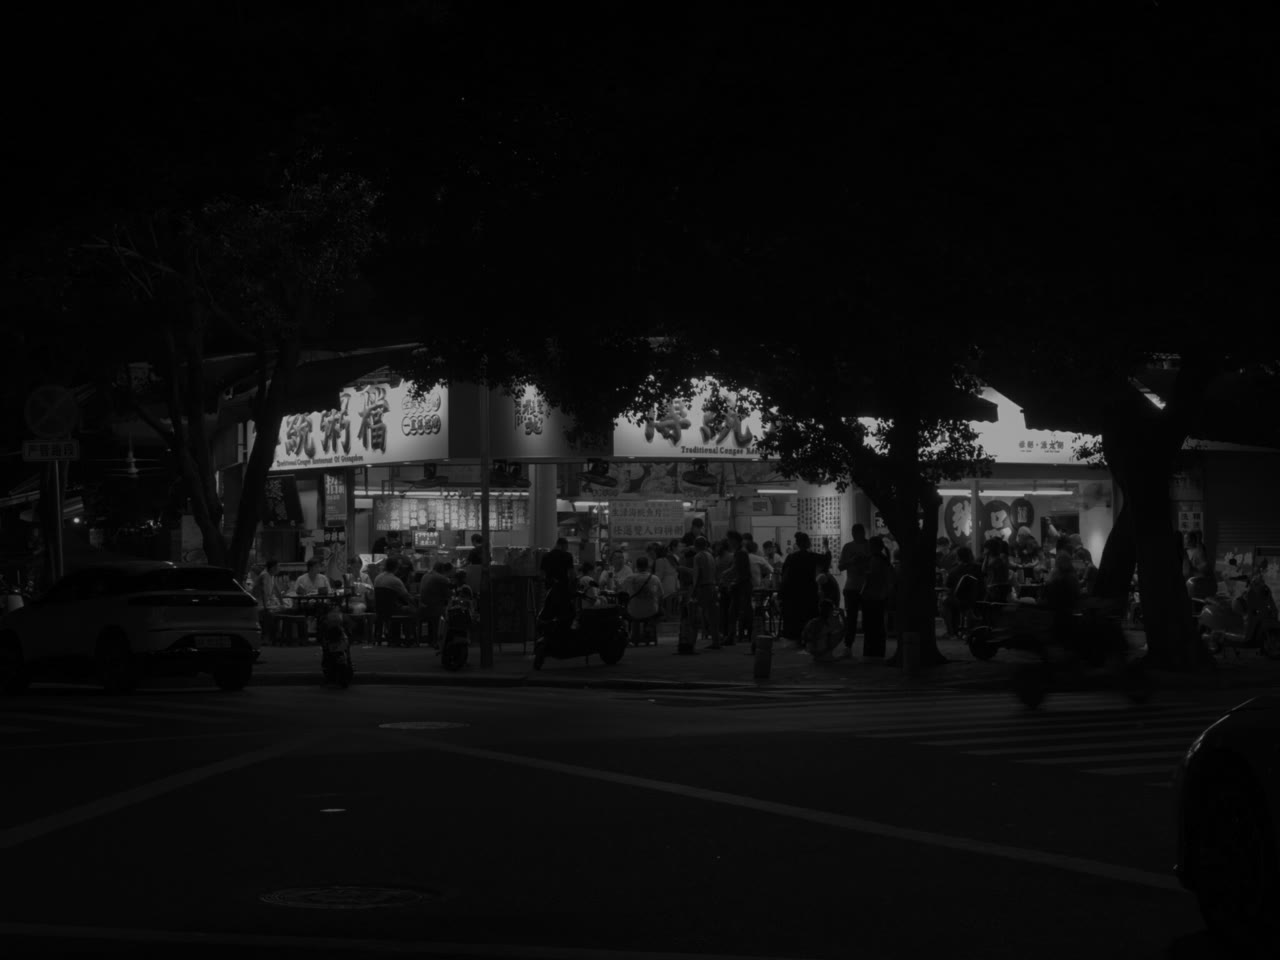
注意增益图里发亮的区域,正好对应成品里冲破 SDR 上限的高光——这就是「base 决定底色、增益图决定哪里该更亮」。Notice the bright areas in the gain map correspond exactly to the highlights that break the SDR ceiling in the result — this is "the base sets the ground color, the gain map decides where it should be brighter".
把这两层按 203 nits 锚定 + PQ 编码合并,再循环成视频,就是整条流水线跑通后的成品:Merge these two layers with 203-nit anchoring + PQ encoding, then loop into video, and you get the finished output of the whole pipeline running end to end:
真正的 HDR10(HEVC / PQ / BT.2020)视频。在支持 HDR 的屏幕上,灯箱和高光会冲破 SDR 上限真正「亮」起来;这里是浏览器压回 SDR 后的预览。下一节就从这段视频回看——同一条算法稍微写错一步,画面会变成什么样。Genuine HDR10 (HEVC / PQ / BT.2020) video. On a HDR-capable screen the light boxes and highlights break the SDR ceiling and truly "light up"; here is the browser's SDR preview after tone-mapping. The next section looks back at this clip — what the image becomes when the same algorithm is written one step wrong.
三种形态,同一个内核Three forms, one core
内核写好后能力就固定了,剩下的工程工作只是换交互层、不重写内核:从命令行到网页再到 Mac App,每一跳只解决"上一层谁还用不了",受众一级级扩大。简单记录如下。 Once the core was written its capability was fixed; the remaining engineering only swapped the interaction layer without rewriting the core: from command line to web to Mac App, each jump solving only "who still couldn't use the previous layer," widening the audience step by step. Briefly:
命令行内核Command-line core
交互式问路径,或一串 -g -e -w -v -d -f 参数。引擎能力 100%,但门槛也 100%:得会用终端、记得住参数、还要先装好 Homebrew 那套库。基本只有作者自己用得动。
Interactively ask for paths, or a string of -g -e -w -v -d -f flags. 100% of the engine's capability, but also 100% of the barrier: you must know the terminal, remember the flags, and have the Homebrew libraries installed first. Basically only the author could use it.
浏览器界面Browser interface
同一个内核外面包一层 Flask,浏览器打开就是图形界面。拖拽上传、可视化调参、实时预览。会用浏览器就能用——这一跳把「会背命令」的门槛彻底拆掉。 The same core wrapped in a layer of Flask — open the browser and it's a graphical interface. Drag-and-drop upload, visual parameter tuning, live preview. If you can use a browser, you can use it — this jump fully removes the "memorize the commands" barrier.
双击即用Double-click to use
用 py2app 把 Python、Flask、WKWebView 和所有 dylib 打进一个 .app:独立窗口、原生文件选择/保存面板、零依赖。DMG 拖进 Applications 就能用,全程不碰终端。
Use py2app to pack Python, Flask, WKWebView, and all dylibs into one .app: standalone window, native file open/save panels, zero dependencies. Drag the DMG into Applications and it works — never touching the terminal.
-g -e -w 参数的少数人"变成"会用浏览器的所有人",而且上传即解析、拖滑块即预览,把盲转和重跑都消掉了。这部分属于工程实现,和 gain map 处理本身关系不大,就不展开了。
The most valuable jump is command line → web: the same conversion capability, with interaction going from "the few who can memorize -g -e -w flags" to "everyone who can use a browser" — plus parse-on-upload and slider-driven preview that kill blind conversion and reruns. This is engineering plumbing, only loosely related to gain-map processing itself, so I'll leave it there.
这个项目教会的三件事Three things this project taught
把整个过程压缩成三句话,换个图像处理项目也能套用。 Compress the whole process into three sentences, applicable to another image-processing project too.
再谈 HDRAnchor absolute luminance
before talking HDR
PQ 是绝对亮度曲线;在本站采用的 BT.2408 SDR→PQ 工作流中,先把 SDR 漫反射白映射到 203 nit,再为高光保留向上的余量。203 nit 是本工作流的参考白锚点,并非所有 SDR→PQ 转换不可改变的前置条件;真正需要避免的是未定义亮度标尺就把 SDR 码值直接当作 PQ 绝对亮度。PQ is an absolute-luminance curve. In the BT.2408 SDR-to-PQ workflow used on this site, SDR diffuse white is first mapped to 203 nits, leaving headroom above it for highlights. Here, 203 nits is the workflow's reference-white anchor, not an immutable prerequisite for every SDR-to-PQ conversion; the real error is treating SDR code values as PQ absolute luminance without first defining a luminance scale.
要在指数域里调Exponential relationships
tune in the exponential domain
增益是 2 的指数次方,强度、插值、曝光补偿都该在 log2 域操作,在像素值上线性混合一定走样。Gain is a power of 2, so strength, interpolation, and exposure compensation should all operate in the log2 domain; linear blending on pixel values always distorts.
用结果反推 bugAlways export evidence
infer bugs from results
每次转换都吐出 base 层、增益图和亮度统计。画面不对时,靠这些中间结果几分钟就能定位是哪一步算错。Every conversion emits the base layer, gain map, and luminance stats. When the image is wrong, these intermediate results pin down which step miscalculated within minutes.
每改一版算法后的核对清单Checklist after each algorithm revision
相关资料Related material
想看成品和背后的色彩科学,可以从这几处继续。 To see the result and the color science behind it, continue from these.